Are you looking for some creative and eco-friendly ways to decorate your home? Look no further! In this article, we’ll share the Top 10 Easy DIY Home Decor Ideas using recycled materials that are not only budget-friendly but also good for the environment. So let’s get started!
Key takeaways from the article:
You can easily create beautiful home decor using recycled materials.
Mason jars, old bottles, magazines, wine corks, t-shirts, wooden pallets, tin cans, wooden crates, and old drawers can all be transformed into the stylish decor.
By using recycled materials, you can save money and help the environment. Here are the Top 10 Easy DIY Home Decor Ideas
- Mason Jar Herb Garden
- Bottle Vase
- Magazine Wall Art
- Wine Cork Coasters
- T-Shirt Pillow
- Pallet Coffee Table
- Tin Can Lanterns
- Bookshelf from Crates
- Painted Plant Pots
- Drawer Shelves
These DIY projects are easy to complete with just a few supplies and some creativity.
Whether you’re looking for new planters, wall art, furniture, or lighting, there’s a recycled material DIY project for you.
By following these Top 10 Easy DIY Home Decor Ideas using recycled materials, you can give your home a unique and eco-friendly touch. So why not give them a try and see what you can create?
Mason Jar Herb Garden
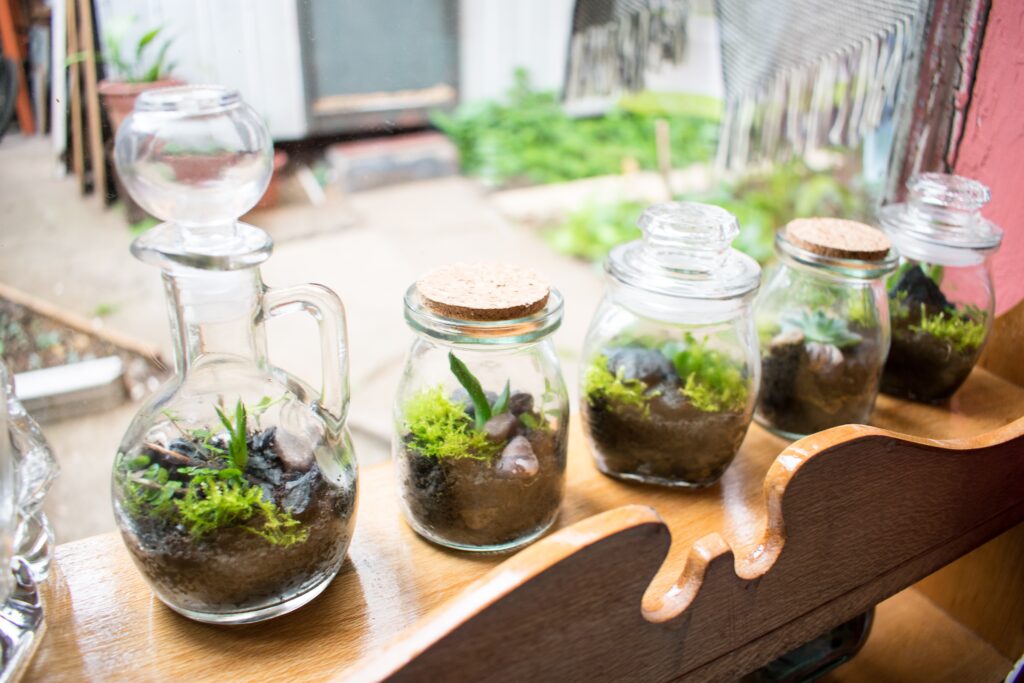
Transform your old mason jars into a beautiful herb garden! All you need is some soil, herb seeds, and a few mason jars. First, fill the jars with soil and plant the herb seeds according to the instructions.
Then, label the jars with the names of the herbs and place them on a windowsill or a shelf. Not only will this add some greenery to your home, but it will also provide fresh herbs for cooking.
A Mason Jar Herb Garden, the first of our Top 10 Easy DIY Home Decor Ideas, is a simple and inexpensive way to grow fresh herbs in your home, apartment, or even office. It involves using Mason jars or other similar glass jars to plant and grow herbs, and it can be a fun and rewarding DIY project for those who enjoy gardening or crafting.
To create a Mason Jar Herb Garden, you will need:
- Mason jars or other similar glass jars
- Potting soil
- Herb seeds or small herb plants
- Small rocks or pebbles (optional)
Here are the steps to follow:
- Choose your herbs: Decide which herbs you would like to grow in your Mason jars. Popular options include basil, cilantro, parsley, rosemary, thyme, and mint. You can choose to grow one type of herb in each jar, or you can mix and match herbs in different jars.
- Prepare your jars: If you are using Mason jars, make sure they are clean and dry. If you are using other glass jars, make sure they are sturdy and have drainage holes or can be easily drilled. Add a layer of small rocks or pebbles to the bottom of each jar to help with drainage (this step is optional).
- Add soil: Fill each jar with potting soil, leaving about an inch of space at the top.
- Plant your herbs: If you are using herb seeds, follow the instructions on the packet for planting depth and spacing. If you are using small herb plants, carefully remove them from their original containers and gently loosen the roots before planting them in the jars. Make sure the soil is firmly packed around each plant.
- Water and care for your herbs: Water your herbs regularly, making sure the soil stays moist but not waterlogged. Place your Mason jars in a sunny location, such as a windowsill or balcony, where they will receive at least six hours of sunlight per day. Rotate the jars every few days to ensure even growth.
With a little care and attention, your Mason Jar Herb Garden can provide you with fresh herbs for cooking, teas, or even natural air fresheners. Happy crafting and gardening!
Read More About – Mason Jar Herb Garden
Bottle Vase
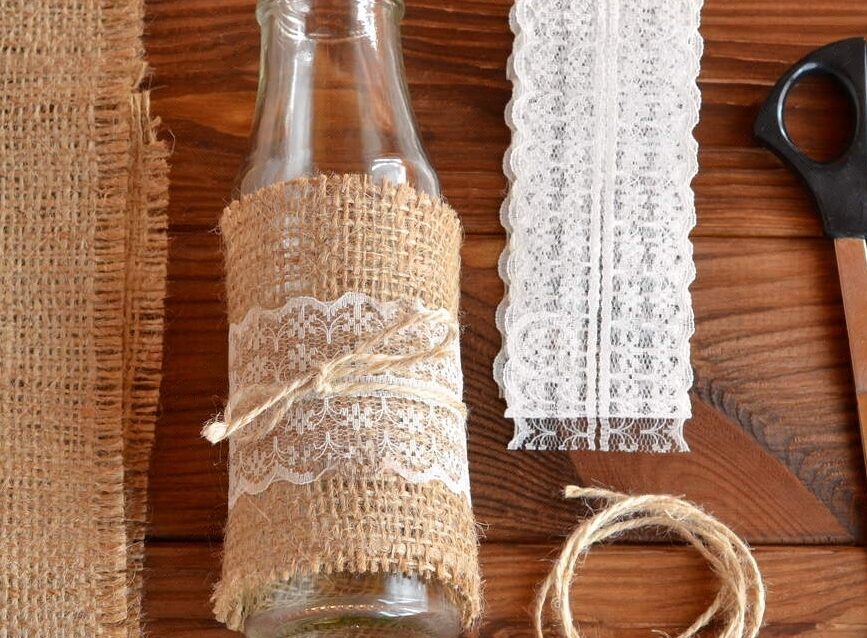
Instead of throwing away empty bottles, turn them into beautiful vases. Clean the bottle thoroughly and remove any labels.
Then, wrap the bottle with jute twine or any other decorative material of your choice, securing it with glue. Fill the vase with water and your favorite flowers for a stunning centerpiece.
Bottle vases are a great way to add a decorative touch to your home, and they’re incredibly easy to make from old bottles.
Whether you have a collection of empty wine bottles, beer bottles, or soda bottles, you can transform them into stunning vases with just a few simple steps.
To make a bottle vase, you’ll need:
- An empty bottle
- Acrylic paint
- Paintbrushes
- Painter’s tape
- Sandpaper
- Optional: spray sealant
Here’s how to make a bottle vase:
- Clean your bottle: First, make sure your bottle is clean and free of any labels or residue.
- Sand the surface: Use sandpaper to lightly sand the surface of the bottle. This will help the paint adhere better.
- Apply painter’s tape: Apply painter’s tape around the top and bottom of the bottle to create a clean line. You can also create a pattern with the tape if you want.
- Paint the bottle: Use acrylic paint to paint the bottle. You can use any color or combination of colors you like. Be sure to let the paint dry completely before removing the tape.
- Remove the tape: Carefully remove the painter’s tape to reveal the clean lines.
- Optional: Seal the surface: If you want to protect the paint and make the vase more durable, you can apply a spray sealant over the surface of the bottle.
That’s it! Your new bottle vase is ready to use. You can add fresh or artificial flowers, or use it as a decorative piece on its own.
One thing to keep in mind when creating a bottle vase is that not all bottles are created equal.
Some bottles may have thinner or weaker glass, which could make them more fragile or prone to cracking when painted.
Be sure to test a small area of the bottle with paint first, and if it seems to be holding up well, you can continue with the rest of the vase.
Overall, creating a bottle vase from recycled materials is an easy and fun DIY project that can add a unique touch to your home decor.
Read More About – Bottle Vase Magic: Transforming Ordinary Bottles Into Stunning Home Decor in 2023!
Top 10 Easy DIY Home Decor Ideas
Magazine Wall Art

Do you have a pile of old magazines lying around? Use them to create unique wall art!
Cut out interesting images or patterns from the magazines and arrange them on a canvas or a piece of cardboard.
Use glue to secure the cutouts in place and frame the finished artwork for display.
Here’s some more information on creating magazine wall art from recycled materials:
Magazine wall art is a creative and eco-friendly way to decorate your walls. It’s also a great way to repurpose old magazines that you no longer need or want.
With just a few supplies and some creativity, you can turn your old magazines into beautiful works of art.
To make magazine wall art, you’ll need:
Old magazines
Scissors
Glue stick or double-sided tape
Cardboard or poster board
Optional: frame or mounting hardware
Here’s how to make magazine wall art:
- Choose your magazines: Look for magazines with colorful pages and interesting images or patterns.
- Cut out the pages: Use scissors to cut out the pages that you want to use for your wall art. You can cut them into squares, rectangles, or any other shape you like.
- Arrange the pages: Arrange the pages on a piece of cardboard or poster board to create your desired design. You can overlap the pages, create patterns, or leave space between them for a more minimalist look.
- Glue the pages: Use a glue stick or double-sided tape to secure the pages to the cardboard or poster board.
- Optional: frame the art: If you want to frame your magazine wall art, you can use a standard picture frame or create a custom frame from wood or other materials.
- Alternatively, you can use mounting hardware to attach the art directly to your wall.
That’s it! Your new magazine wall art is ready to hang. You can create multiple pieces to create a gallery wall or create a single large piece for a statement wall.
One thing to keep in mind when creating magazine wall art is that the colors and patterns of the pages you choose will have a big impact on the final result.
Play around with different combinations and layouts to find the perfect look for your space.
Overall, creating magazine wall art from recycled materials is a fun and easy DIY project that can add a unique touch to your home decor.
You can read more about – DIY Magazine Wall Art Projects
=== Top 10 Easy DIY Home Decor Ideas ===
Wine Cork Coasters
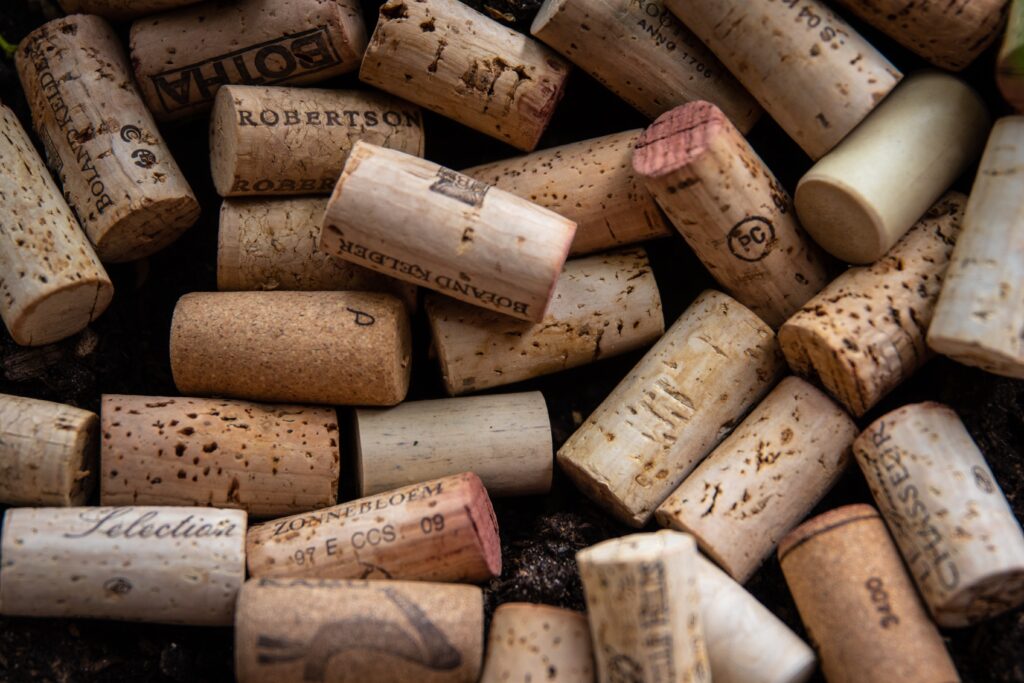
Coming towards the 4th Home Decor Ideas from the Top 10 Easy DIY Home Decor Ideas, I would like to ask if you’re a wine lover, you probably have a collection of corks lying around. Turn them into coasters to protect your furniture!
Glue the corks together in a circular or square shape, and then glue a piece of felt to the bottom to prevent scratches.
Here’s some more information on creating wine cork coasters from recycled materials:
Wine cork coasters are a practical and stylish way to protect your furniture from water rings and stains.
Plus, they’re a great way to repurpose old wine corks that would otherwise end up in the trash.
With just a few supplies and some creativity, you can turn your wine corks into beautiful and functional coasters.
To make wine cork coasters, you’ll need:
Wine corks
Sharp knife or box cutter
Cutting board
Sandpaper
Glue gun
Cork backing or felt
Scissors
Here’s how to make wine cork coasters:
- Cut the wine corks: Use a sharp knife or box cutter to carefully cut the wine corks into thin slices. You’ll need about 6-8 slices per coaster, depending on the size of the cork.
- Sand the slices: Use sandpaper to sand the edges of the cork slices until they’re smooth.
- Arrange the slices: Arrange the cork slices on a flat surface to create your desired pattern. You can create a simple square or rectangle shape, or get creative with other shapes and patterns.
- Glue the slices: Use a glue gun to glue the cork slices together. Be sure to apply enough glue to create a secure bond between the slices.
- Add backing: Once the glue has dried, cut a piece of cork backing or felt to fit the bottom of the coaster. Use a glue gun to attach the backing to the bottom of the coaster.
That’s it! Your new wine cork coasters are ready to use. You can make multiple sets to use throughout your home or give them as gifts to friends and family.
One thing to keep in mind when creating wine cork coasters is that not all wine corks are created equal.
Some corks may be harder or softer than others, which could affect how easily they cut and how well they hold together.
Be sure to test a few corks before cutting and gluing them all to make sure they’ll work for your project.
Overall, creating wine cork coasters from recycled materials is a fun and easy DIY project that can add a touch of rustic charm to your home decor.
T-Shirt Pillow
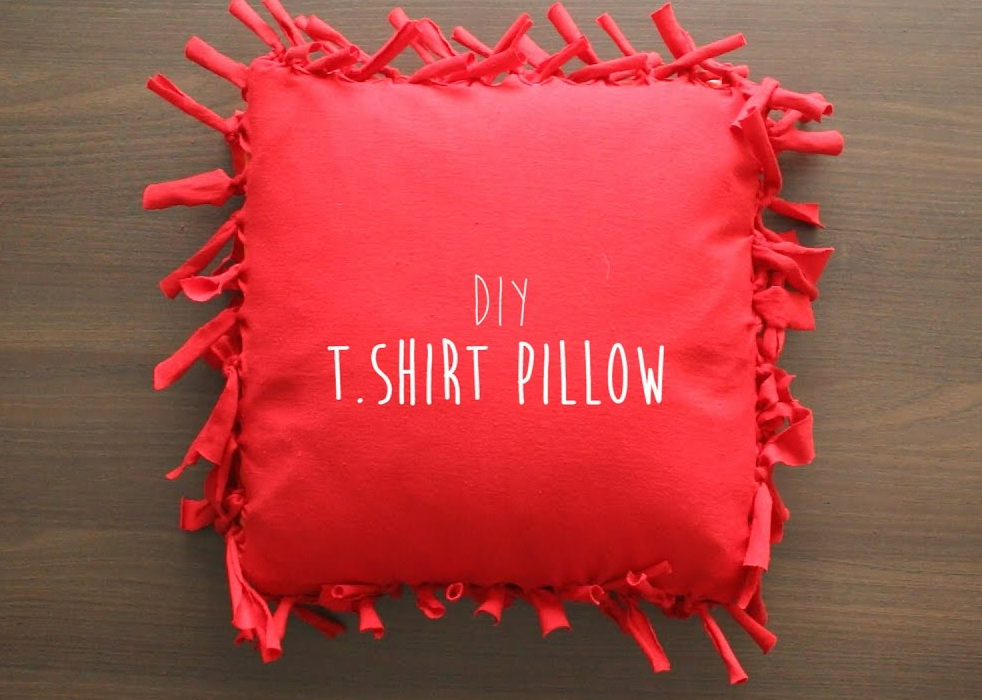
Do you have some old t-shirts that you don’t wear anymore? Give them new life by turning them into pillows!
Cut the t-shirt into a square or rectangular shape, leaving enough room for stuffing.
Then, sew the edges together, leaving a small opening to stuff the pillow with batting or old clothes. Finally, sew the opening closed and enjoy your new cozy pillow.
Here’s some more information on creating a t-shirt pillow from recycled materials:
A t-shirt pillow is a cozy and eco-friendly way to repurpose old t-shirts that you no longer wear or need.
With just a few supplies and some basic sewing skills, you can turn your old t-shirts into comfortable and stylish throw pillows for your home.
To make a t-shirt pillow, you’ll need:
Old t-shirts
Scissors
Sewing machine or needle and thread
Pillow stuffing or old pillows
Here’s how to make a t-shirt pillow:
- Choose your t-shirts: Look for t-shirts with fun graphics or patterns that you want to showcase on your pillow.
- Cut the t-shirts: Use scissors to cut the t-shirts into two large squares or rectangles that are the same size. You can also cut out the graphic or pattern on the t-shirt and use that as the front of your pillow, with a solid-colored fabric as the back.
- Sew the t-shirts: Place the two pieces of t-shirt fabric together with the right sides facing each other. Use a sewing machine or needle and thread to sew around three sides of the fabric, leaving one side open.
- Stuff the pillow: Turn the fabric right side out and stuff it with pillow stuffing or old pillows. You can adjust the amount of stuffing to your desired level of firmness.
- Close the pillow: Use a sewing machine or needle and thread to sew the open side of the fabric closed.
That’s it! Your new t-shirt pillow is ready to use. You can make multiple pillows using different t-shirts to create a fun and eclectic look.
One thing to keep in mind when creating t-shirt pillows is that not all t-shirts are created equal.
Some t-shirts may be thinner or stretchier than others, which could affect how easily they sew and how well they hold their shape. Be sure to choose t-shirts that are in good
Pallet Coffee Table
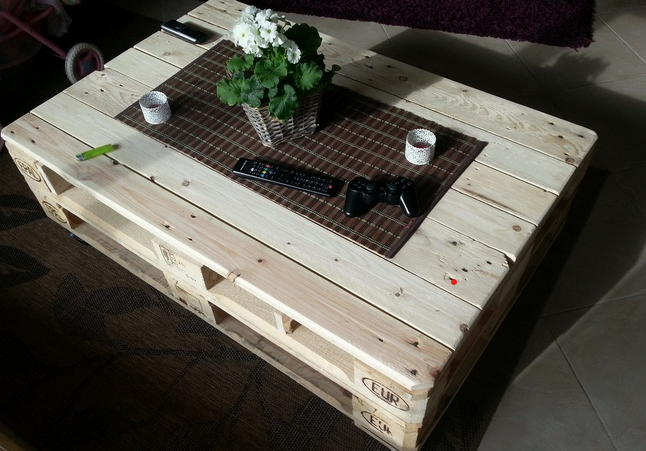
Transform an old wooden pallet into a rustic coffee table for your living room.
Sand the pallet to remove any rough edges, and then paint or stain it to match your decor.
Add some casters to the bottom for easy movement and a glass top for a sleek finish.
Here’s some more information on creating a pallet coffee table from recycled materials:
A pallet coffee table is a rustic and budget-friendly way to add a unique piece of furniture to your living room.
Pallets are easy to find and can be repurposed into a variety of furniture pieces, including coffee tables.
To make a pallet coffee table, you’ll need:
A wooden pallet
Hammer
Pry bar
Sandpaper or electric sander
Saw
Wood screws
Drill
Optional: Paint or stain
Here’s how to make a pallet coffee table:
- Dismantle the pallet: Use a hammer and pry bar to dismantle the pallet, separating the top boards from the bottom boards. You’ll need 4-6 of the top boards to create the tabletop of your coffee table.
- Sand the boards: Use sandpaper or an electric sander to smooth out the boards and remove any rough edges or splinters.
- Cut the boards: Use a saw to cut the boards to your desired length. This will depend on the size of your pallet and the desired size of your coffee table.
- Create the tabletop: Arrange the boards together to create the tabletop of your coffee table. Use wood screws and a drill to secure the boards together.
- Create the base: Use the remaining bottom boards of the pallet to create the base of your coffee table. Cut the boards to the same length as the tabletop boards and arrange them into a rectangular shape. Use wood screws and a drill to secure the baseboards together.
- Attach the tabletop to the base: Use wood screws and a drill to attach the tabletop to the base of your coffee table.
- Optional: Paint or stain the table: If desired, you can paint or stain your pallet coffee table to match your decor. Be sure to let the paint or stain dry completely before using the table.
That’s it! Your new pallet coffee table is ready to use. You can customize the size and style of your coffee table by choosing different pallets and finishes.
One thing to keep in mind when creating pallet furniture is that not all pallets are created equal.
Some pallets may have been treated with chemicals that could be harmful to your health.
Be sure to choose pallets that are labeled as “HT” (heat-treated) rather than “MB” (methyl bromide) to ensure that they’re safe for use in your home.
Overall, creating a pallet coffee table from recycled materials is a fun and rewarding DIY project that can add a rustic touch to your living room decor.
Top 10 Easy DIY Home Decor Ideas
Tin Can Lanterns
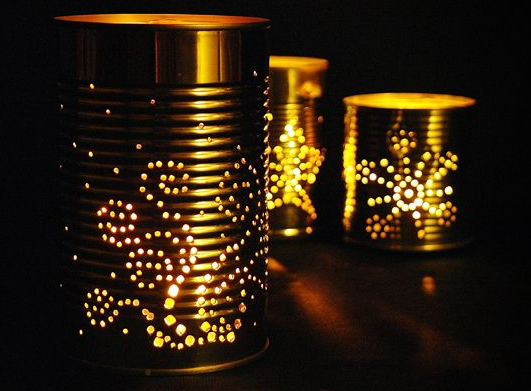
Create some ambiance in your backyard by making tin can lanterns! First, clean the can and remove any labels.
Then, use a hammer and nail to punch holes in the can in any pattern you like.
Finally, insert a tea light or a votive candle and enjoy the soft glow.
here’s some more information on creating tin can lanterns:
Tin can lanterns are a great way to add a warm and cozy ambiance to your outdoor space.
They’re easy to make and can be customized to fit your style and preferences.
Plus, they’re a great way to upcycle and repurpose old tin cans.
To make tin can lanterns, you’ll need:
Clean and empty tin cans
Hammer and nail
Pliers
Wire (optional)
Tea light candles or LED tea lights
Here’s how to make tin can lanterns:
- Clean the tin cans: Start by cleaning the tin cans thoroughly with soap and water. Remove any labels or stickers, and let the cans dry completely.
- Create a design: Using a marker, draw a design or pattern onto the can. You can create a simple design with dots or stars, or create a more intricate design by drawing a picture or stencil onto the can.
- Create holes: Using a hammer and nail, carefully create holes in the can along the design or pattern. Be sure to space the holes evenly and make them large enough to allow light to shine through.
- Optional: Add wire handles: To make it easier to hang the lanterns, you can add wire handles to the cans. Use pliers to bend a piece of wire into a handle shape, and attach it to the top of the can.
- Add a candle: Place a tea light candle or LED tea light inside the can. Be sure to place it on a level surface and away from any flammable materials.
Enjoy your lantern: Light the candle and enjoy the warm and cozy ambiance of your new tin can lantern.
You can make multiple tins can lanterns with different designs and sizes to create a unique and personalized outdoor space.
These lanterns are perfect for outdoor gatherings, camping trips, or just a cozy evening on your porch.
When making tin can lanterns, be sure to use caution and handle the tin cans and tools carefully.
Wear gloves to protect your hands, and always supervise children when making and using these lanterns.
Overall, tin can lanterns are a fun and easy DIY project that can add a unique and charming touch to your outdoor space.
Give them a try and enjoy the warm glow of your new lanterns!
=== Top 10 Easy DIY Home Decor Ideas ===
Bookshelf from Crates
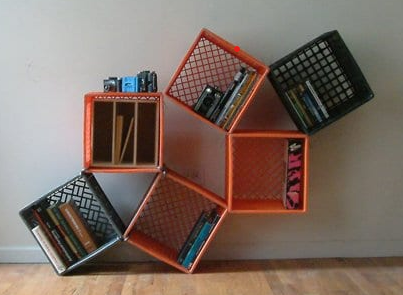
If you require some extra storage, turn old wooden crates into a stylish bookshelf!
Stack the crates on top of each other and secure them with screws or brackets.
Then, paint or stain them to match your decor and fill them with books or other decorative items.
Here’s some additional information on creating a bookshelf from crates:
Creating a bookshelf from crates is a simple and affordable way to add both storage and style to your home. You can use old wooden crates that you have lying around or find them at thrift stores or flea markets.
Here’s how to make a bookshelf from crates:
- Collect wooden crates: Gather wooden crates that are all the same size and shape. You’ll need at least four crates to make a bookshelf, but you can use more if you want a larger shelf.
- Sand and paint the crates: Sand the crates to smooth out any rough edges or splinters. Then, paint the crates in a color of your choice. You can also stain the crates for a more rustic look.
- Arrange the crates: Decide on the arrangement of the crates for your bookshelf. You can stack them vertically or horizontally, or create a more unique design by stacking them at an angle or in a zigzag pattern.
- Attach the crates: Using screws and a drill, attach the crates to create the bookshelf. You can attach the crates in a variety of ways, such as by screwing them directly into each other or by using metal brackets to hold them together.
- Secure the bookshelf: Once the crates are attached, secure the bookshelf to the wall using brackets or L-shaped brackets. This will ensure that the bookshelf is stable and safe to use.
- Add your books: Once your bookshelf is complete, you can add your favorite books and decorative items. You can also add baskets or bins to the bookshelf for additional storage.
A bookshelf made from crates is a versatile and stylish addition to any room in your home.
You can use it in a living room to display books and decorative items, in a bedroom to store clothes or shoes, or even in a kitchen to hold cookbooks and cooking supplies.
When making a bookshelf from crates, be sure to choose sturdy crates that can hold the weight of your items.
You should also handle the tools and materials with care and use safety equipment such as gloves and safety goggles.
With a little creativity and some basic DIY skills, you can create a beautiful and functional bookshelf from crates.
Painted Plant Pots
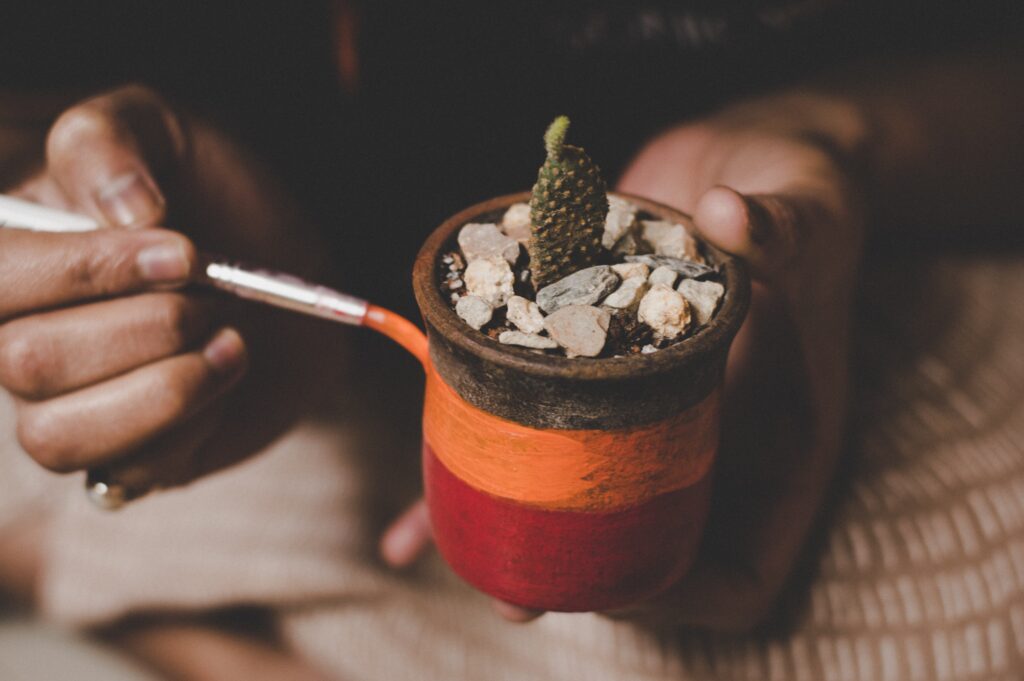
Add some color to your indoor or outdoor plants by painting the pots! Choose any color or pattern you like and use acrylic paint to decorate the pots.
Let them dry completely before planting your favorite flowers or herbs.
Here’s some additional information on painting plant pots:
Painting plant pots is a great way to add a personal touch to your indoor or outdoor plants.
You can use any type of paint, such as acrylic, spray paint, or even chalk paint, to transform a plain plant pot into a work of art.
Here are some tips for painting plant pots:
- Choose your paint: Decide on the type of paint you want to use. Acrylic paint is a great option for indoor plant pots, as it dries quickly and is easy to clean up. Spray paint is a good choice for outdoor plant pots, as it is weather-resistant and provides a smooth, even finish. Chalk paint can be used on both indoor and outdoor plant pots and gives a more rustic, shabby-chic look.
- Clean and prep the pots: Clean the plant pots thoroughly and let them dry completely before painting. If the pots have any stickers or labels on them, remove them with a scraper or sandpaper. If you want to add a design or pattern to the pots, sketch it out lightly with a pencil.
- Paint the pots: Apply the paint to the plant pots using a brush, roller, or spray can. Make sure to apply the paint evenly and cover the entire surface of the pot. If you are using multiple colors, let each coat dry completely before applying the next one.
- Add finishing touches: Once the paint is dry, you can add any finishing touches such as a clear coat of sealant to protect the paint from wear and tear. You can also add decorative elements like stencils, stickers, or washi tape for a more personalized look.
- Plant your plants: Once the plant pots are fully dry, you can plant your favorite plants in them and enjoy your new, colorful creations.
Painted plant pots can add a pop of color and personality to any space.
You can mix and match colors and patterns to create a unique and eclectic look, or stick to a more cohesive theme for a more polished appearance.
When painting plant pots, be sure to work in a well-ventilated area and protect your surfaces with newspaper or a drop cloth.
With a little creativity and some paint, you can transform plain plant pots into beautiful works of art.
Drawer Shelves
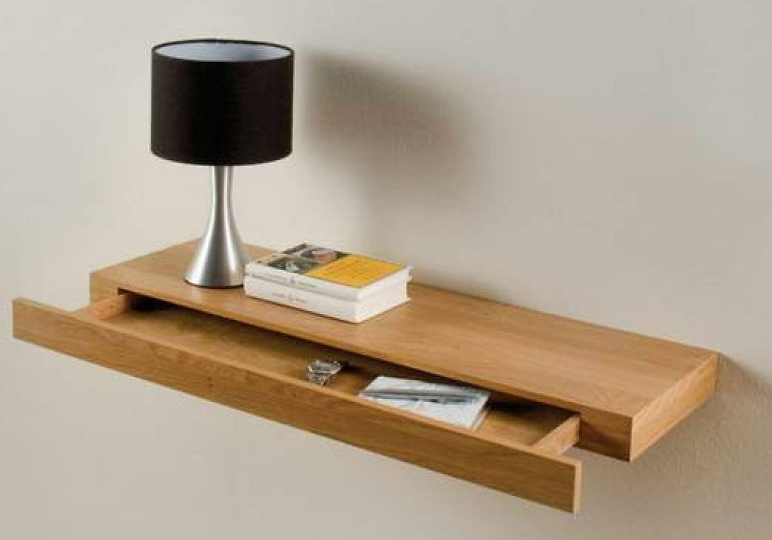
Turn old drawers into unique shelves for your walls! Remove the drawers from an old dresser and clean them thoroughly. Then, sand and paint or stain them to match your decor.
Finally, attach brackets to the back of the drawers and mount them on the wall.
Here’s some additional information on making shelves from old drawers:
Drawer shelves are a great way to upcycle old or unwanted drawers and turn them into functional and stylish storage units.
Here are some tips for creating your drawer shelves:
- Choose your drawers: Look for drawers that are in good condition and are the right size for the shelves you want to create. You can use old drawers from dressers, cabinets, or even discarded furniture.
- Clean and prep the drawers: Clean the drawers thoroughly and let them dry completely before beginning. Remove any hardware or knobs from the drawer fronts if necessary.
- Cut the drawers: Using a saw, carefully cut the front off of the drawers. This will create open shelf space for your items.
- Sand and finish the drawers: Sand the edges of the cutout drawer front to smooth any rough edges. You can also sand and paint or stain the entire drawer for a more finished look.
- Install the shelves: Install the shelves in the cutout area of the drawer using brackets or support rails. You can use wooden shelves, glass shelves, or even repurpose other materials like cutting boards or old cabinet doors.
- Hang the shelves: Attach the drawer shelves to the wall using appropriate hardware, making sure to use anchors if needed for heavier items.
Drawer shelves are a versatile storage solution that can be used in any room of the house.
They can be used to display decorative items, store books and knick-knacks, or even hold small plants.
When creating drawer shelves, be sure to measure your space and choose the appropriate size and number of shelves to fit your needs.
With a little creativity and some basic DIY skills, you can turn old drawers into unique and practical shelves.
Before we wrap up, we’d love to hear what you think of these Top 10 easy DIY home decor ideas using recycled materials.
Have you tried any of them? Do you have any other creative ideas to share?
Do visit our website – The DIY and Crafts
If you enjoyed this article, be sure to check out our website for more DIY and home decor inspiration. You might also be interested in our article “5 Eco-Friendly Home Decor Ideas“ and “DIY Home Decor Ideas for the Holidays” which provides more tips on how to decorate your home in an eco-conscious way.
Thank you for reading, and happy crafting!
You can also read –

Pingback: 5 DIY Eco-Friendly Home Decor Ideas - The DIY and Crafts
Pingback: Organic Gardening Made Easy: Tips & Tricks for a Thriving Garden
Pingback: DIY Raised Garden Beds: Grow Your Own Fresh Produce
Pingback: DIY Furniture Sliders - Say Goodbye to Scratched Floors Forever