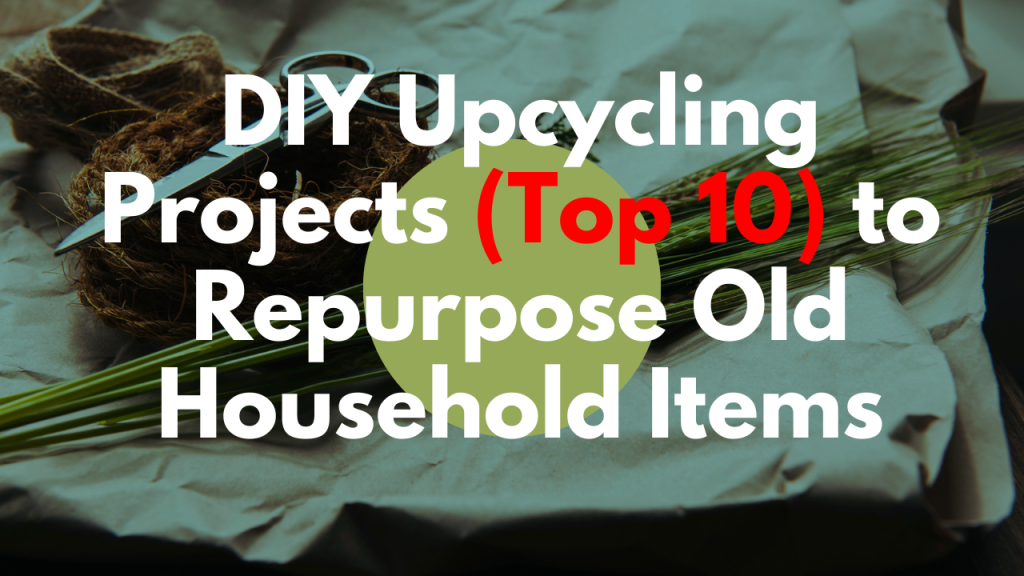
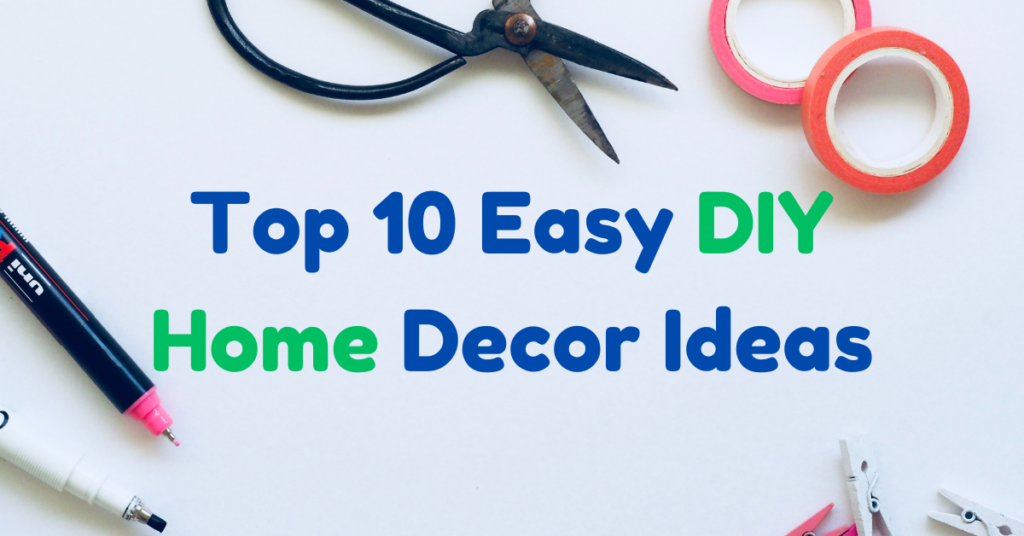
Welcome to our guide on upcycling projects! In this article, we’ll show you 10 creative and fun DIY Upcycling Projects that can help you repurpose old household items and give them a new life.
Whether you’re looking to save money, reduce waste, or simply get creative, upcycling is a great way to do it. From turning an old ladder into a bookshelf to transforming an old sweater into a cozy pet bed, we’ll cover a variety of projects that are easy and fun to make.
By the end of this article, you’ll have plenty of ideas and inspiration for your DIY Upcycling Projects. So let’s get started!
| Key Takeaways |
|---|
| 1. Upcycling is a great way to repurpose old household items and give them a new life. |
| 2. You can save money and reduce waste by upcycling instead of buying new items. |
| 3. There are a variety of materials that can be upcycled, including wood, fabric, and metal. |
| 4. Upcycling projects can range from simple to complex, depending on your skill level and the materials you have. |
| 5. With a little creativity and imagination, you can transform almost anything into something new and useful. |
Upcycled bookshelf made from an old ladder | DIY Upcycling Projects
Here are the steps and required items:
Materials:
- An old ladder
- Sandpaper
- Paint or wood stain (optional)
- Wall anchors (if needed)
- Level
- Measuring tape
- Screws
Steps:
- Start by cleaning the ladder thoroughly to remove any dirt, dust, or debris. Use sandpaper to smooth out any rough spots or splinters.
- If desired, paint or stain the ladder to give it a fresh new look. Allow the paint or stain to dry completely before moving on to the next step.
- Decide where you want to hang the ladder bookshelf and measure the space to determine the best height and width for the ladder.
- Use a level to ensure that the ladder is straight and mark the placement of the screws on the wall.
- Pre-drill holes in the wall where you marked the screw placement.
- Use screws to attach the ladder to the wall, making sure it is secure and level.
- Place books or other items on the rungs of the ladder to create a unique and functional bookshelf.
This project is a great way to upcycle an old ladder and turn it into a useful piece of furniture. It’s important to choose a sturdy ladder in good condition to ensure that it can support the weight of the books or other items. Depending on the height and weight of the ladder, you may need to use wall anchors or additional support to keep it secure.
Cozy pet bed made from an old sweater or sweatshirt | DIY Upcycling Projects

Materials:
- An old sweater or sweatshirt
- Pillow stuffing or old blankets/clothing
- Scissors
- Sewing machine or needle and thread
Steps:
- Start by choosing an old sweater or sweatshirt that you no longer wear, but is still in good condition.
- Cut off the sleeves and collar of the sweater, leaving the main body intact.
- Turn the sweater inside out and sew the bottom of the sweater closed.
- Fill the sweater with pillow stuffing, old blankets, or clothing until it is fully stuffed, but not too firm.
- Sew the neck opening of the sweater closed.
- Fold the sweater over to create a “roof” for the pet bed.
- Sew the two sides of the sweater together to create the walls of the pet bed.
- Turn the pet bed right side out and fluff up the stuffing to create a cozy and comfortable spot for your pet to rest.
This project is a great way to upcycle old clothing and create a cozy spot for your furry friend. You can choose a sweater or sweatshirt in a color or pattern that matches your home decor, and the bed can be easily washed or even thrown in the dryer. It’s important to ensure that the stuffing is evenly distributed and not too firm to provide a comfortable spot for your pet. You can checkout some more DIY ideas here
Planters made from old tires or shoes | DIY Upcycling Projects

Materials:
- Old tires or shoes
- Box cutter or sharp knife
- Spray paint (optional)
- Potting soil
- Plants or seeds
Steps:
- Start by cleaning the old tires or shoes to remove any dirt or debris.
- If using old tires, cut them in half using a box cutter or sharp knife. If using shoes, remove the insoles and laces.
- If desired, paint the tires or shoes using spray paint in a well-ventilated area. Allow the paint to dry completely before moving on to the next step.
- Fill the tires or shoes with potting soil, leaving enough space at the top for the plants or seeds.
- Plant the desired plants or seeds in the soil, following the recommended planting depth and spacing.
- Water the plants or seeds thoroughly and place the planters in a sunny location.
This project is a great way to upcycle old tires or shoes and turn them into unique and eco-friendly planters. It’s important to ensure that the tires or shoes are thoroughly cleaned to avoid any contaminants that could harm the plants. You can choose to paint the planters in a color or pattern that matches your home decor or leave them as is for a more rustic look. The planters can be used to grow flowers, herbs, or even vegetables, making them a fun and functional addition to your outdoor space.
Rustic wall art made from salvaged wood or metal | DIY Upcycling Projects

Materials:
- Salvaged wood or metal
- Sandpaper
- Paint or stain (optional)
- Paintbrush (optional)
- Picture hangers or screws
Steps:
- Start by selecting a piece of salvaged wood or metal in the size and shape that you want for your wall art.
- Sand the wood or metal to remove any rough edges or splinters.
- If desired, paint or stain the wood or metal using a paintbrush and let it dry completely.
- Decide on the design for your wall art. You can use stencils or create a freehand design.
- Use a pencil to sketch out the design on the wood or metal.
- Use paint or a permanent marker to fill in the design on the wood or metal.
- Allow the paint or marker to dry completely.
- Attach picture hangers or screws to the back of the wood or metal so it can be hung on the wall.
This project is a great way to create unique and personalized wall art while also repurposing salvaged materials. The possibilities for design are endless, allowing you to create a piece that fits your personal style and home decor. You can choose to leave the wood or metal in its natural state or paint it to match your color scheme. The finished product is a beautiful and sustainable addition to any room in your home.
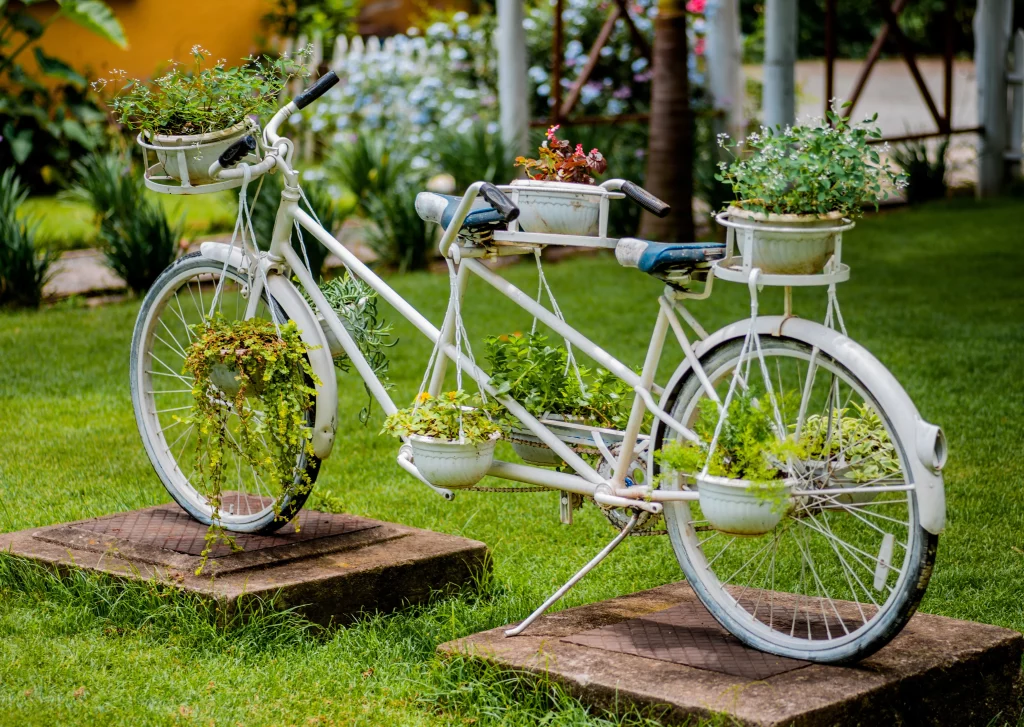
Garden trellis made from old bike frames or other metal parts
Materials:
- Old bike frames or other metal parts (such as pipes, rods, or wires)
- Wire cutters or metal saw
- Measuring tape
- Zip ties or wire
- Hammer
- Soil and plants (to grow on the trellis)
Steps:
- Gather the old bike frames or other metal parts and clean them thoroughly to remove any rust or dirt.
- Determine the size and shape of the trellis you want to create and measure out the lengths of metal needed.
- Cut the metal to size using wire cutters or a metal saw.
- Lay out the metal pieces in the desired pattern for your trellis, ensuring they are spaced evenly.
- Use zip ties or wire to secure the metal pieces together at the joints, making sure they are securely fastened.
- Hammer the bottom of the trellis into the soil, ensuring it is stable and sturdy.
- Plant the desired climbing plants at the base of the trellis and train them to climb up the metal frame.
This project is a great way to create a unique and functional garden trellis while also repurposing old metal parts. The trellis provides support for climbing plants, helping to maximize garden space and add visual interest. You can choose to use old bike frames or other metal parts such as pipes, rods, or wires to create a trellis that fits your style and matches your home decor. The finished product is a sustainable and attractive addition to any garden or outdoor space.
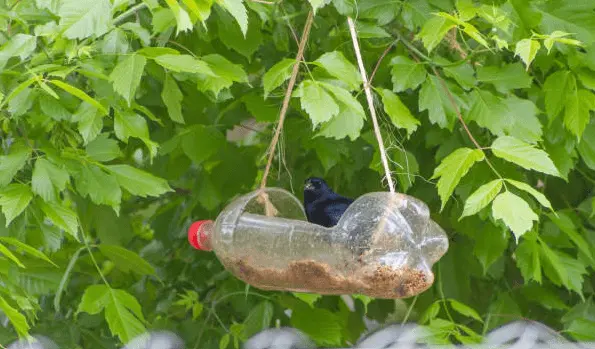
Bird feeder from a recycled plastic bottle
Materials:
- Clean, empty plastic bottle with a cap
- Wooden spoons or sticks
- Twine or string
- Scissors
- Birdseed
Steps:
- Clean and dry the plastic bottle thoroughly, removing any labels or adhesive.
- Cut two small holes, one on each side of the bottle, approximately one inch below the cap.
- Insert a wooden spoon or stick through each hole, making sure they are even in length and position.
- Cut a small hole in the bottom of the bottle, approximately the same size as the diameter of the wooden spoon or stick.
- Thread a length of twine or string through the hole in the cap and tie it securely, making a loop for hanging the feeder.
- Fill the feeder with birdseed, making sure to leave enough space for the birds to access the seed.
- Hang the feeder from a tree branch or other sturdy support.
This project is a great way to repurpose a plastic bottle into a functional bird feeder. It is also a fun activity to do with kids, as they can help fill the feeder with birdseed and watch as the birds come to feed. You can choose to use different types of wooden spoons or sticks to create a unique look for your bird feeder and customize the size of the holes based on the type of birdseed you are using. The finished product is a sustainable and eco-friendly addition to any backyard or outdoor space.
Jewelry organizer made from a repurposed picture frame or cheese grater | DIY Upcycling Projects
Materials:
- The picture frame or cheese grater
- Spray paint (optional)
- Sandpaper (optional)
- Corkboard or fabric
- Scissors
- Glue gun
- Hooks or knobs
- Decorative ribbon or twine (optional)
Steps:
- Choose a picture frame or cheese grater that is the size and style you want for your jewelry organizer.
- If desired, spray paint the frame or cheese grater with a color of your choice, or sand down any rough spots to create a smoother surface.
- Cut a piece of corkboard or fabric to fit inside the frame or cheese grater, making sure it is the same size as the back opening.
- Using a glue gun, attach the corkboard or fabric to the back of the frame or cheese grater.
- Attach hooks or knobs to the bottom of the frame or cheese grater, spacing them evenly to create hanging space for necklaces and bracelets.
- If desired, tie decorative ribbon or twine around the top of the frame or cheese grater to create additional hanging space for earrings.
- Hang the jewelry organizer on a wall or door using a picture hanger or hook.
This project is a great way to create a functional and stylish jewelry organizer while also repurposing an old picture frame or cheese grater. You can choose to paint or decorate the frame or cheese grater to match your personal style and home decor and customize the placement and number of hooks and knobs based on your jewelry collection. The finished product is a sustainable and eco-friendly addition to your bedroom or bathroom, helping to keep your jewelry organized and easily accessible.
Decorative vase made from a repurposed light bulb or glass bottle | DIY Upcycling Projects
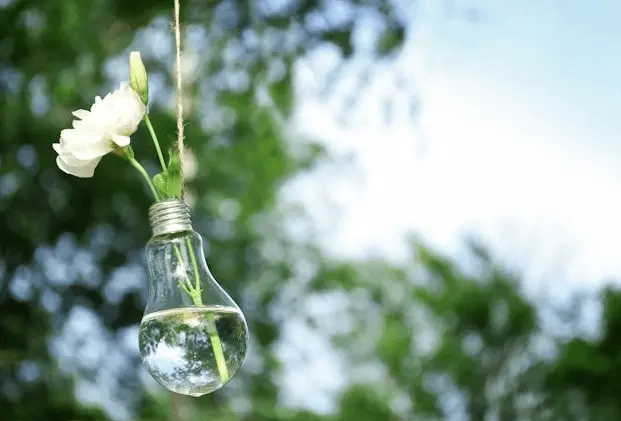
Materials:
- A light bulb or glass bottle
- Pliers or wire cutters
- Screwdriver
- Safety glasses
- Sandpaper
- Decorative items (e.g. twine, ribbon, beads, flowers, etc.)
- Hot glue gun (optional)
Steps:
- Put on safety glasses to protect your eyes.
- If using a light bulb, carefully remove the metal end with pliers or wire cutters, being careful not to break the glass. If using a glass bottle, remove any labels or adhesive residue with warm soapy water and dry it completely.
- Use a screwdriver to break up any remaining internal components of the light bulb (if using).
- Use sandpaper to smooth out any sharp edges on the opening of the light bulb or glass bottle.
- Decorate the outside of the light bulb or glass bottle with your chosen decorative items. This could include wrapping twine or ribbon around the neck, gluing beads or stones to the outside, or attaching flowers or other natural elements.
- If desired, fill the vase with water and add fresh flowers or greenery.
This project is a great way to repurpose old light bulbs or glass bottles into functional and stylish decorative vases. You can choose to customize the vase with any decorative items you like, making it a unique addition to your home decor. The finished product is a sustainable and eco-friendly way to add a touch of beauty to any room in your home.
Desk organizer made from old cans or jars | DIY Upcycling Projects
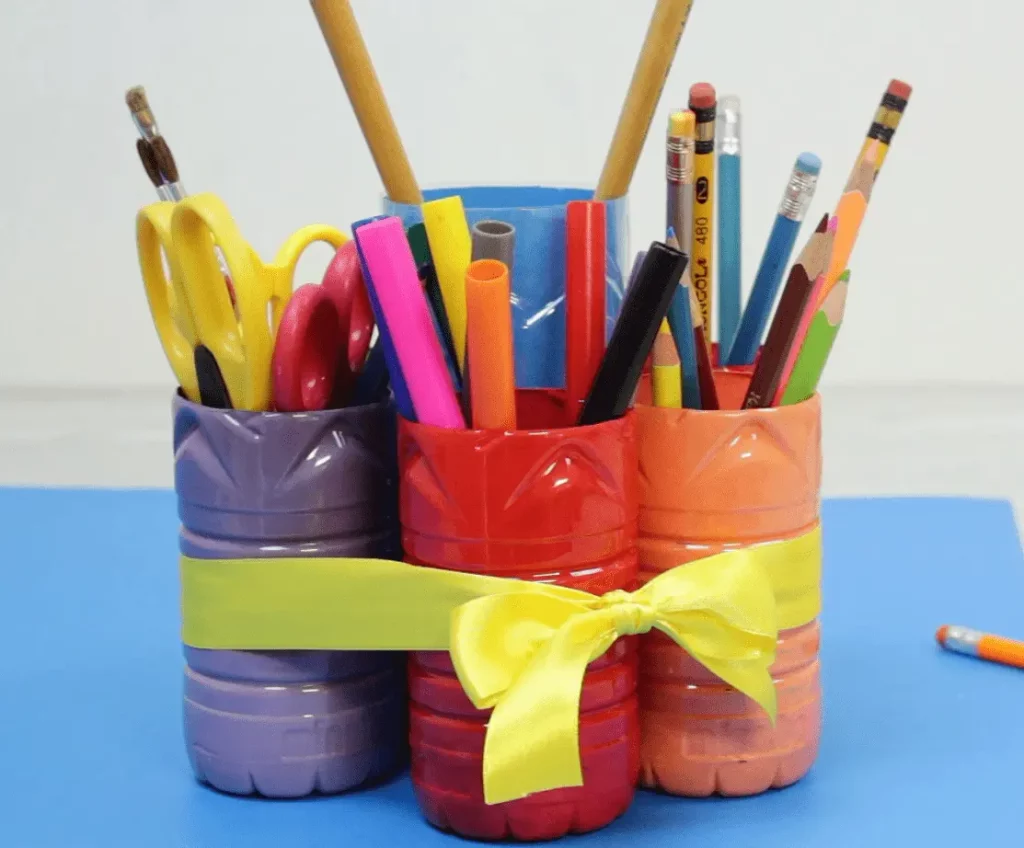
Materials:
- Empty cans or jars
- Spray paint (optional)
- Decorative paper or fabric
- Scissors
- Glue
- Ruler
- Pencil
- Craft knife
- Cutting mat (optional)
Steps:
- Clean and dry the cans or jars you will be using for your desk organizer.
- If desired, spray paint the cans or jars with your chosen color and let them dry completely.
- Measure the height and circumference of each can or jar and cut a piece of decorative paper or fabric to size.
- Use glue to attach the paper or fabric to the outside of each can or jar.
- Use a craft knife and ruler to cut small openings in the paper or fabric on the front of each can or jar, creating a space to insert pens, pencils, or other office supplies.
- Arrange the cans or jars in a desired pattern and glue them together to create your desk organizer.
This project is a great way to repurpose old cans or jars into a functional and stylish desk organizer. By using decorative paper or fabric, you can customize the look of your organizer to match your personal style or office decor. The finished product is a sustainable and eco-friendly way to keep your desk tidy and organized.
Hanging shelves made from old leather belts or other straps | DIY Upcycling Projects
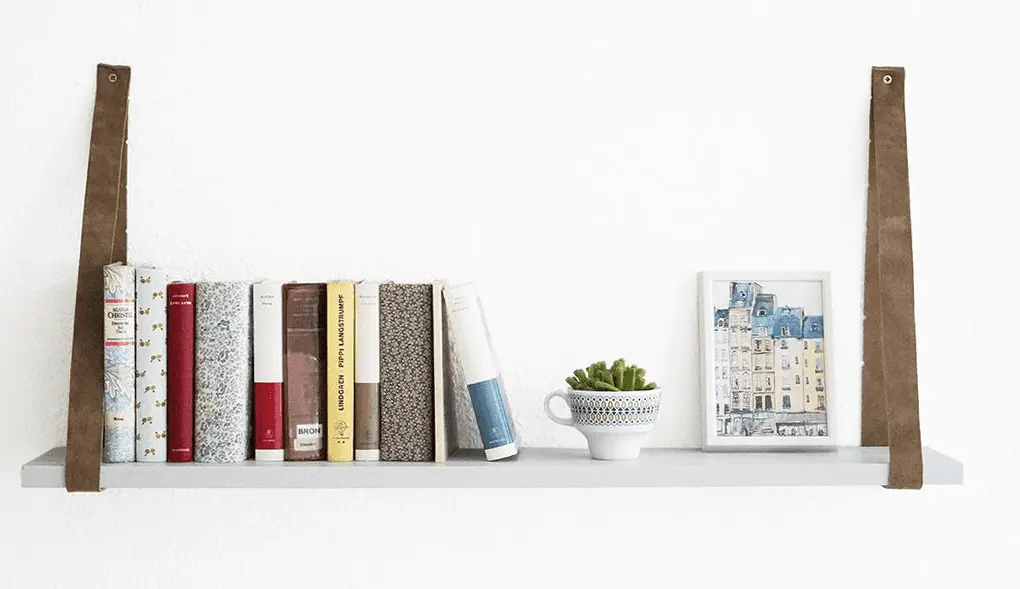
Materials:
- Old leather belts or other straps (such as canvas or fabric)
- Wooden boards (cut to the desired size)
- Screws
- Drill
- Level
- Wall anchors (optional)
- Decorative items (such as plants, books, or picture frames)
Steps:
- Cut your wooden boards to the desired size for your hanging shelves.
- Determine the spacing for your shelves and mark where you want the screws to go on the wooden boards.
- Pre-drill holes into the marked spots on the wooden boards.
- Cut the leather belts or other straps into lengths that will fit around the wooden boards and hang from your desired location. Leave enough length on the straps to create loops for hanging.
- Thread the straps through the pre-drilled holes in the wooden boards and create loops on each end.
- Hang the straps from your desired location, making sure they are level. If necessary, use wall anchors to secure the straps to the wall.
- Place decorative items, such as plants, books, or picture frames, on your hanging shelves.
This project is a great way to repurpose old leather belts or other straps into functional and stylish hanging shelves. By using wooden boards, you can customize the size and shape of your shelves to fit your space and storage needs. The finished product is a sustainable and eco-friendly way to add storage and decoration to any room in your home.
Conclusion
In this article, we’ve shared 10 creative DIY project ideas that you can make using repurposed materials. From a cozy pet bed made from an old sweater to a garden trellis made from old bike frames, these projects are not only fun to make but also great for the environment. By repurposing materials that would otherwise go to waste, you can save money, reduce your carbon footprint, and unleash your creativity.
By following the steps we’ve outlined for each project, you can create functional and stylish items for your home or garden. We hope that you’ve found these project ideas inspiring and that you’re excited to try them out for yourself.
If you have any feedback about this article, please comment below and let us know what you think. We’re always looking to improve our content and provide our readers with valuable information.
Don’t forget to check out our other articles on DIY and crafts for more inspiration and ideas. Whether you’re looking for home decor projects, gardening tips, or eco-friendly ideas, we have something for everyone. Thanks for reading, and happy crafting!
You can also read –
Pingback: 5 DIY Eco-Friendly Home Decor Ideas - The DIY and Crafts
Pingback: DIY Natural Cleaning Products: Homemade Recipes for a Chemical-Free Home